Video Bar

Loading...

The Countdown to the Second Big Belt Sander Race at AWFS 2009 begins!

Though this was originally posted in 2007 prior to the 2007 AWFS show, there will be another belt sander race at AWFS in July 2009, so we'll start to add to this blog again soon. We took second place in 2007 by 9/100 of a second, so we our efforts discribed here did pay off. We have to some improvments in our minds that we'll share, so check back and get in the race!
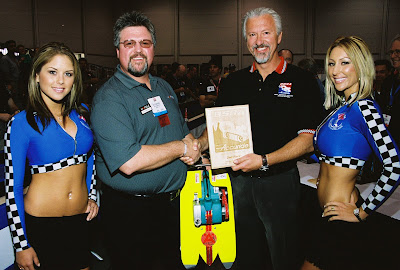
Accuride Inc, a famous drawer slide manufacturer, announced that they would be sponsoring a Belt Sander Race at the AWFS show, which is held every-other July in Las Vegas. In fact, they've formed the the Belt Sander Racing Association, or BRSA to support and promote this exciting sport. I've had a secret desire to get involved in this ever since reading a back cover article in Fine Woodworking many years ago on Belt Sander Racing, so when our drawer slide Product Manager encouraged me to get into the race it didn't take much prodding. Along with another Product Manager, Daniel, we plan to enter the race in the only scoring class at this event, which is the Modified Class. Here's a link to a pdf file on the rules and regulations.

I'm a bit surprised at how little information about this is on the web. There are a few videos on Youtube, including one from an Accuride rep whose sander got whooped, (Sorry Chris, but you got "Eclipsed".) and a few local groups who hold regular races have simple sites with a few photos, but other than that I've been unable to locate any "build sites". So in the interest of posterity and the advancement of the craft I will share with you almost everything that we learn along the way. I say ALMOST everything, because the competitor in me still wants to have a little advantage on race day! I make one promise: I will not provide inaccurate information. This can't be said for a few competitors who I've spoken with, who have tried to send me down the garden path with downright deception. I'll share all that I can and will remain silent on the rest. Fair enough?

Here's a photo of the foundation of our racer: A Makita 9403 which I snagged on Amazon for a great price. My research uncovered that this sander is the fastest stock sander, with 1650fpm (feet per minute). That fact alone makes this a great choice if you are racing in the Stock Class. Seeing that the track is 75' long, and for simplicity let's just figure that it reaches full speed instantaneously, (I wish) that means that this sander theoretically could cover that distance in 2.2 seconds. Now, obviously it will have to build-up to full speed, and there will be some time loss due to slippage between the belt and the track and even between the belt and the drive roller, but this is still a good start.

Scroll To The Bottom For New "Belt Sander Racer Confessions"

While I did tell you lots of valuable info in this blog, because I am still actively racing there are still a few things I am keeping to myself. That said there are a few more tidbits that I'm planning on letting out in the days leading up to the 2009 BSRA Nationals at AWFS in Las Vegas. Scroll to the bottom of this blog to see the new "Belt Sander Racer Confessions". Scott

Here's a video of our finished sander in action at the AWFS Show 2007

I can not believe the irony in the description on the masthead of this blog, which I typed months before the actual race took place. That’s right, our sander launched out of the track in what was described by the MC as “The most spectacular thing I’ve seen in my 20 years of witnessing belt sander races!” In the end our efforts were rewarded by a second place finish, just .09 seconds behind first place! Not too shabby for a couple first-timers!

We also became the first racers to have a video camera mounted on the sander during an actual race. The footage is part of the montage in the video below

See additional videos of the race through the links in the thumbnail photos above.

See, there's nothin' wrong with second place!

Scott Jordan, President of Accuride, presents Hafele America Co's Scott Markwood with the plaque for second place at the BSRA race at AWFS 2007.
The ladies in the photo worked hard during the event by returning the extension cords to the center of the track between each race.

My wife’s first comments upon seeing this photo was “Nice sleeves”. Followed by “No play for Mr. Grey”. Scott and I both thank you for your support Hon.

Click the pic to Biggie-Size it

There She is!


Daniel Tripp (left) is the world-famous "Sander Catcher" as seen in the videos above. The sander shown was the first "Häfele Functionality Racer" flown by Häfele America Co. at the AWFS show in Las Vegas July 2007. The building of this sander is covered in depth in the build-blog of the builder, Häfele America Co's Training Coordinator, Scott Markwood (right). www.belt-sander-racer.blogspot.com

Click the pic to Biggie-Size it

The moment of impact; The “Häfele Functionality” Belt Sander Racer heading off the launch pad!


This amazing photo was captured by a Charles McMurray rep from CA and was passed on to me by Jamie Goodwin of Accuride. If you look closely you can even see the ghost of the sander as it surged forward and over the shock absorber at the finish line.
Looks like Chris Huff (On the right with the camera) had a nice front row view!

(See the video at the link at the top of this page)

Click the pic to Biggie-Size it

Here's a view of the crowd at BRSA race at the 2007 AWFS show

I just read on AWFS’s site that thousands were in attendance for this race. Now, I'm told that there were seats for 500-600 people, and there was by my estimates at another 200 or so standing at any one time, but they cycled in and out. So, if I use my 1970’s public school “New Math” skills it looks like there were at least 7000 in attendance! 700 or 7000, either way it was a great first-time attendance and I’m sure it’s only going to grow from here.
Man, that's one long track!

The posts below cover the step-by-step (sort of) build of our Award-Winning Belt Sander Racer

The most logical first step was to remove the belt cover.

With only a single screw to hold it in place this was simple enough. If you take a look you"ll notice that this photo was obviously staged because the small pulley is shown slightly loose on it's shaft. It looked like the quick fix to speeding this bad boy up would be a quick swap of the two pulleys, but when is anything worth doing ever simple?


Removing the drive belt is an easy task.

The belt is a toothed or cogged belt, which means it's going to have to go. Why? Well, at the speeds that we're shooting for a cogged belt will be ripped to shreds, and believe it or not we need to accommodate a "little" slip between the belt and the pulley upon start-up, so as I said, the toothed belt was bad news. Notice that the shaft at the center of the small pulley is now sticking out from the pulley just a bit. This is because I twisted it back on the shaft after noticing that in the previous staged photo that I failed to spin it all the way down for the previous pic. Anyway, grabbing the belt and pulling it away from the sander while rotating the large pulley slowly was all it took to remove the belt.

Well looky here! The pulleys have taught me a lesson. Just call me the Tool Whisperer.

This pulley taught me several things:
1.) It pays to take your time thinking about how tools are made and the forces that are at play. This shaft turns counter-clockwise and therefore must have left-hand threads.
2.) If this one has left-hand threads then the large shaft must have a right-hand thread. Crud! So much for my first thought about simply swapping the two. Oh yeah, I'm going to use a poly-v belt so I have to replace the pulleys anyway. (I've got to get more sleep!)

You'll notice from the photo that the pulley has a recess that is needed to allow the pulley to seat in the shoulder of the shaft while leaving room for the plastic housing that restrains the bearing. My plan to replace this pulley will require either a similar recess on the replacement pulley, or perhaps a washer that can slip on the shaft and space the new pulley proud of the plastic case. Hummm. I think I'm going to sleep on that one.

I'm torn over whether to disclose this idea or not...

I guess in the interest of promoting the art of racing I'll go ahead and share this idea. I'm sure I'm not the first to think of this, but I've never seen it discussed. We're about to remove the exhaust fan. Why? Well, let me ask you this; Why do we need it? We aren't really sanding anything, and as I see it, it's just offering resistance. Seeing how these races last all of 2.5-3 seconds every fraction of a second counts, and this part just isn't needed. The cover came off with four screws.

Hey look, more parts to toss!

The white plastic part looks like a diverter or seal that retains and funnels the dust into the dust bag. I've never looked into this part of a sander before so it's kind of cool to see the path that the dust follows from the rear roller through the fan and into the bag. Simple and clever. I like it and now it must go!

See ya!

This part just lifted right off. It was held in place by pressure from the cast metal side of the sander.

The fan is fixed with a single screw and washer

The screw was easy to remove. You'll need to hold the fan stationary with one hand while loosening the screw.

Oh, come on! How many posts can one silly part take?

I guess one more! The fan lifted right off. I don't know much this amputation is going to help, but I figure it's not going to hurt. Sort of wish I'd kept this to myself until after the race though! If this tip was new to you don't you think this was worth a click on one of the sponsor links to the left? Thanks.

Time for a bagectomy

Now I'm beginning to wonder to myself; "Self, why didn't I didn't pull the dust bag off before now?" You can see that the bag is pressed into an elbow which is retained by a groove in the casting. This entire assembly lifted right off.

I wonder if there will still be some air movement through this or if this will whistle like blowing over a pop bottle? (That's right, I said "Pop". I'm from Ohio.)

The front knob is held with two screws

Not only is the knob extra weight, but the two threaded holes should be a great place to anchor parts of the body. What body? Well, perhaps I'm being to generous with that term. The sander will need "something" to keep it centered in the 12" wide track, and until I decide what method to use I choose to think of this as the body of the racer. Trust me, if I'm going to the trouble of removing something as light as this knob I'm not about to replace it with a heavy body. I believe that style or theme is a portion of the competition, so whatever we do it needs to add something to the sander's character.

Hmmmm. Oh look, more screws to remove!

Not too sure what to do with what I find under here, but I have to take a look.


Careful son, there's scary stuff in there!

This is odd. The wire that leads from the switch to the motor is a lighter gauge than the wire in the cord. That can probably be improved. I also don't like the way the cord is above the handle so perhaps I'll relocate it below the switch.
As I review the videos on Youtube I noticed several sanders pop a bit of a wheelie at the start of the race, and having the cord lower may lower the center of gravity a tad. Additionally if the cord hits a snag during the race having it lower might keep it from tipping up. Can't hurt. (I think)

Let's take a look at the front roller

Before we dig into the front roller I've got to tell you that I'm surprised by how poorly this roller idles. What I mean is when you have the belt off and you spin the roller it grinds to a stop after about two rotations. I suspect that I know why this is, but we'll know for sure in just a few seconds.


I stopped by Harbor Freight and picked-up a set of snap ring pliers. They have a belt sander on sale for $20! Why am I going through this learning curve with a $200+ sander? Because that's the way I roll, that's why.

One squeeze of the pliers and "plop" the axle dropped out of sight.

Oh, and it looks like I'll be replacing the snap ring too. I'll have to learn not to squeeze those pliers so hard I guess.

Yeah, it's just as a feared. No bearings.

Beneath the steel washer in the background was this bronze bushing. That explains why the roller idled so poorly. What to do? I suppose I could polish the axle and do some investigative work to find the best lubricant, or perhaps I should press in a ball bearing. Press it in where? Oh yeah, there's nowhere to press a bearing into.

OK, so do I turn a new roller all together with accommodations for bearings? (Sigh) Maybe.

Not much holdin' that roller, is there?

In this picture you can see the axle has a polished end. This is because the bushing doesn't run the entire length of the roller and the axle is turned a bit thinner in the center to reduce the area making contact with the bushing. In fact, there are two bushings, one at each end of the roller. I suppose if you must use bushings that this is the way to do it, but if I was going to use this sander for actual sanding I can see how this would become a maintenance nightmare. The axle was quite oily and I'm sure it would be a dust magnet.

For some reason I just had to go deeper

It just took two screws and a tug on the casting and I was staring into the belly of the beast. The bad news was as I was gutting this pig I heard a loud "CLICK" and my heart sank. I forgot about the brushes!

Stupid brushes!

There they are. I now need to remove the brushes because the commutator won't slip past the brushes now that they have been driven inward by their springs.

What's a commutator, you ask?

The commutator is the part that the brushes rub against in order to energize the motor. It's all very interesting and if this is new to you check out HowStuffWorks for an explanation. Make sure you click the "Next" button to see the animation.
Anyway, you can see that the carbon portion of the brush is long and intact, so these will work fine for hundreds of hours.

Here's a look at the cooling fan. Hmmmmm.

No, I'll fight the urge to remove the fan, even though a 2 second race isn't going to cause the sander to overheat. I can't see this little fan slowing the sander down by a measurable amount, so for now, it stays.


While were here, let's keep going

This cover slipped right off exposing the field magnet, which is actually two strong electromagnets. The black plastic cover appears to be a dust cover. I guess I'll leave this on too. Man, I'm really getting lenient in my old age.

I wonder what's under this thingy?

There is a steel or stainless steel plate on the bottom of the sander which is called the platen. The platen is a flat surface that backs-up the sanding belt and without a firm or semi-firm platen, the belt can't create a flat surface. In this case the platen is backed-up by a cork backer, which is common. Below the cork is a waffle-like casting, which makes sense. Had this been a solid surface it would have been difficult for Makita to grind it flat due to warping caused by the heat of grinding. By making this waffle-like they can easily grind it flat, and the cork will smooth out the surface of the platen. Nice work Makita.

Time to deal with the switch

I've seen three videos online where a sander failed to start off the line because the "Driver" didn't lock the trigger into the on position. I've decided that this must not happen to our sander so either the switch needs to be taped down, or the switch must go.

There's no turning back now

The switch must go.

All gone!

The switch is now off and it occurs to me, "If you're going to hardwire the cord, why are you using the entire 8' cord?" Hey, I'm right. The extra cord will just take more amperage, so why not convert it to a pigtail?

Look at all that extra wire!

Switch gone, cord gone. Next we connect the pigtail to the motor wires.

Add a few wire nuts

And the installation is complete.


Fuzzy pic, but you get the idea


The wires and wire nuts are tucked nicely in place, and the cord is anchored with a little plastic bracket.

A little tape and we're done

The cord still concerned me that it was anchored so high on the handle, so a few rounds with the tape and the cord is fixed nicely. This is starting to look good. Oops! This photo is out of order! More on that next.

How do you mount a common pulley on a 10mm left hand threaded shaft?

You can't, that's how. Off to the shop with some 1/2" steel rod and a few minutes later we have two new shafts. The lower shaft that originally had the large pulley had a M10 shaft with a right hand thread, so that one is easy. The left hand thread just wasn't going to happen with the time that I have left so desperate times called for desperate action. I drilled a 9mm hole and using the sander's own motor, filing the threads down just a hair made two parts that were just a smidgen shy of fitting. Perfect. Smear a little high-strength epoxy on what remained of the threads and with a hammer the shaft was driven home. We checked the O.D. of the shaft and it didn't bulge a bit. We'll let the epoxy set for a few hours before messing with the pulleys.

Why is it that I can never find a tap wrench unless I don't need it?

Thank you Mr. Grip for your wonderful invention! Just in case you're wondering, no, I didn't turn the lathe on during this step. It does make a nice bench vice for just such an occasion.

30 minutes is long enough, isn't it?

Here are the new pulleys in place on the new shaft extensions. Looks good. Now, where can I find a 17 5/8" long v-belt?

Anyone?

Bueller?

Got my drive belt

After confirming at a local belt/pulley/bearing shop that the belt I needed was not a stock size and that a link belt made sense, it was off to Woodcraft. The bearing house had this belt too, but I just didn't think I needed 200 feet of it! I figured that 24 links would be just about right, but just in case I purchased 4 feet. I linked 24 links together and "Ta-Da!" it's just about perfect!

Gotta choose a sanding belt next... but how?

I recalled an article in Fine Woodworking in which they compared the effectiveness of several random orbit sanders using an clever method. They weighed identical boards before and after sanding for an equal amount of time. I figured that this method could be modified for this purpose so off to the shop we go. I started by cutting and then weighing identical sized pieces of plywood. I chose ply because it looks like this is what Accuride used for their track. My thinking is the belt that removes the most wood in the allotted time would be my winner. Good idea? I don't know, but it's all I've got.

So many belts, so little time

Here's a view of the progress mid-test. I had 11 different belts from my favorite manufacturer, Carborundum.
These belts featured Aluminum Oxide, Silicon Carbide, Zirconia Alumina, and Ceramic abrasive.


How were the tests run and what did we learn?

Each belt was mounted on the sander and run in mid-air under no load for ten seconds to allow the belt to flex and stretch a bit. Tracking was also adjusted and then the sander, running at full speed, was brought into contact with the board for 10 seconds. The sander was held loosely in one hand and was allowed to slide gently from side to side about 1/2 inch to keep the paper from clogging. As you can see from the photo the sander is leaning left due to the poor balance brought on by the new heavy pulleys and arbors. The boards and the belts were numbered to keep everything in organized. From here the boards were re-weighed. The weird thing is all but one belt removed .2oz's, but that one magical belt removed .3oz's. That doesn't sound like much but it's 50% more than all the others. I re-tested this belt and sure enough, .3oz's again. I have my belt! By the way, the belt used on the board above is not the winner.

Which one won? I'm not telling! At least not until after the race.


Test over and you can still see my plaid shirt

With a massive combined total of 2 whole minutes of sanding, I was shocked to see how many places on and under my clothes were covered in swarf ! (That's sanding dust you know) Fun test.
Now, what's next and why are my eyes burning?

We're entering TWO sanders in the BSRA race at Vegas!

I'm stoked because it looks like there will be both a Stock and a Modified class at AWFS in Vegas, so we've registered a sander in each class! We're getting a new sander for the stock category and now I need to get cracking on a new body for each of them. Our 2007 sander got smacked-up pretty badly, so we're going to start from scratch. The trick is the track Accuride made has side walls made from plastic lumber; and in the Vegas heat they swell-up a bit. That means that though they say the track is 12" wide, it actually varies a 1/4" or more, so the body of the sander has to be able to accommodate the variation.

For those of you who are put-off by the cost of a sander you might take a look at Harbor Freight. No, I'm serious! They have a 4" X 24" sander (ITEM 96435-1VGA) that is only $79, and it looks just like the Makita 9403 (I wonder why...). The 9403 has become hard to find and rather expensive in recent years, so I'm tempted to give this one a shot. There was one person in 2007 who ran the orange Harbor Freight sander (shown at right) as a stock racer, but it made an embarasing run, so make sure you modify it if you can.

How about this for a body?


I'm still not sure how we're going to make this happen, but the body of the hydroplane in this photo is what I have in mind for our sander “body”. I don’t think ours will be three-dimensional, but I like the looks of this.

Sander is loaded into track and ready for second race.


Our sander is in the track and ready for its third race. This photo shows the CVS one-time-use video camera mounted on the body. This race was against Louis & Co. See video for the results of this race.

Click the pic to Biggie-Size it, and stop staring at my belly!

Here's a view of the bottom of the racer's "Body"

The built of the body went so fast that I forgot to snap photos! Here’s a good picture for any of you who want to know more about how you can build your own racing sander. From this view you can see the rollers that are mounted to the bottom of the "body" which helped to keep the sander centered in the track. Several sanders at the BSRA race at the AWFS show simply ran their sanders down the track with only drive train modifications. Their sanders may have been fast, but they bounced from one side of the track to the other the entire length of the race, loosing momentum with every bump. The rollers I used are part of a very simple sliding door system from Häfele, part # 404.32.951 and were quickly screwed to the bottom of the body. Well, that’s not exactly accurate. Daniel and I took a hacksaw to them to remove a couple superfluous metal thingies, but other than that it was a simple solution.

Accuride has just posted a new video which shows the actual track


Here's a great FREE site that will keep you informed if anything new gets posted!

You can be the first to know if something new is added to this blog (Or any other site of interest for that matter). Visit http://www.watchthatpage.com and sign up for a free account. You can then add any url to your personal list and you'll be emailed should anything change. I've used this site for several years to keep track of changes on one of my favorite sites: http://www.woodshopdemos.com which is a site that rarely changes. Test it out with our blog and you'll be the first to know if anything changes!

Belt Sander Racer Confession #1: I Upgraded the Platen

6/9/09 In the post titled "I wonder what's under this thingy" I went into a bunch of detail about the stainless steel platen on the bottom of the sander. This was what magicians call misdirection. It's why magicians use pretty assistants.

That information in that post was true, but during the actual race I didn't use the stock platen. Nope, I was aware that an upgrade existed that would make the belt slip like Vaseline on a door knob, and that is the Porter-Cable 48119 Graphite Impregnated Sanding Shoe. Though this part wasn't made for my sander, it took almost no modification. I did have to trip 1/8" off with a pair of scissors, but that was it. I beeves that this single upgrade gave me an advantage over most sander in the field.

Belt Sander Racer Confession #2: I Swapped the Pulleys

At the last second (in the pits no less) I wound-up switching the large pulley for a smaller one. The big one shown here was very fast, but it caused the sander to accelerate very slowly. If the race lasted 10 seconds or more this wouldn't be a problem, but in the end we broke the 3 second barrier, so I guess we made the correct choice. I left the photo of the large pulley on the blog because it was the only one I had at the time, plus that whole misdirection thing.

Loading...